

Fermenting is an easy way to preserve vegetables and get some incredible health benefits, too. Our fermenting 101 guide will teach you everything you need to know to get started!
In days gone by, fermenting food for storage was every bit as common as canning, dehydrating, and freezing are today. Sadly, the popularity of fermenting foods died out with the easy availability of processed foods off the shelf.
It’s too bad because it turns out that our ancestors were really onto something good with their crocks and jars of fermented pickles, sauerkraut, and other fermented foods in the root cellar. Fermenting isn’t just an easy way to preserve the harvest, it’s also a great way to support your overall health.
If the world were perfect, there would be plenty of beneficial bacteria in our food and surroundings to keep our digestive tracts at optimum health. Unfortunately, that’s not usually the case anymore.
If you’re eating the standard American diet, you’re consuming fruits and vegetables that have been sanitized to kill off all bacteria (good and bad), pasteurized dairy, and round after round of antibiotics along with your store-bought meat and produce.
Simply put, we need those good bacteria for our gut to thrive, and we’re not getting them.
Click to View Table of Contents
The Health Benefits of Eating Lacto-Fermented Foods
The good news is, if you’re a homesteader who grows much of your own food, your diet is probably quite a bit better than the average American. But, there’s always room for improvement! And, the health benefits of fermented foods can make a real difference to almost every system of the body.
- Fermented Foods Support Friendly Gut Bacteria: When we eat fermented foods, we are ingesting an actual ecosystem of friendly bacteria that support our gastrointestinal systems. These beneficial microbes live in the large intestine and kill off harmful bacteria that cause illness and disease.
- Fermented Foods are Good for Your Endocrine System: Your GI tract includes everything from your mouth to your… ummm… end. It’s the most extensive endocrine organ system of your body, and it controls everything from your immune system and metabolism to your emotional responses. In the past, there’s been a lot of talk about the thyroid (another endocrine organ), but it turns out that your GI tract has three times more impact on fighting off illness, maintaining your weight, and stabilizing your moods.
- Fermented Foods are Good for Digestion: One of the natural by-products of eating living fermented foods is acid that helps the body break down micronutrients and macronutrients that we get through our diet. This digestive acid makes things like lactose more comfortable to digest while reducing bloating and other digestive issues.
- Fermented Foods Assist in Nutrient Absorption: When you consume fermented foods, the healthy bacteria transform the digested nutrients into a more easily absorbable form. The nutrients are more readily available to the body. For example, calcium absorption is greatly enhanced by healthy gut bacteria, which we all know is crucial for maintaining healthy bones as we age.
- Fermented Foods are Good for Your Skin, Hair, and Nails: Vitamin B12, biotin, and folic acid are all essential for healthy skin, hair, and nails. When your gut contains healthy bacteria, it is more efficient at synthesizing these crucial nutrients.
How Fermentation Works
When you hear the term Lacto-fermented… the first thing that comes to mind might be milk, but in this case, Lacto actually refers to lactic-acid. The bacteria that naturally occur on vegetables and fruit are known as lactobacillus.
When fruits and vegetables are submerged in an oxygen-free environment, the lactobacillus bacteria go to work and sugar into lactic acid. The lactic acid is what gives Lacto-fermented foods their trademark sour or tangy flavor.
Fermenting 101: How to Ferment Your Home-Grown Vegetables
Fermenting is starting to sound pretty intriguing now, isn’t it? You probably don’t need a whole lot of coaxing to give it a try, but we also want to point out that the process is really easy, and you don’t need a bunch of expensive equipment.
Not only that, but fermented foods are also incredibly delicious… even though they smell a little funky sometimes! And, did we mention that fermented vegetables can be stored in a cold, dark place for several months? Your refrigerator, a very cold (but not freezing) basement, or a root cellar would all be ideal.
The best way to get all the benefits of fermented foods is to eat a little bit of them every day. Here’s how to ferment just about any vegetable from your garden.
1. Start with high-quality, organically grown produce.
Obviously, if you’re growing your own, you’ve already got this covered. If not, you may wish to purchase some seasonal produce from a local farmer’s market, so be sure to choose only organically grown vegetables. Pesticides and chemicals will kill off all that good bacteria before you even make the purchase.
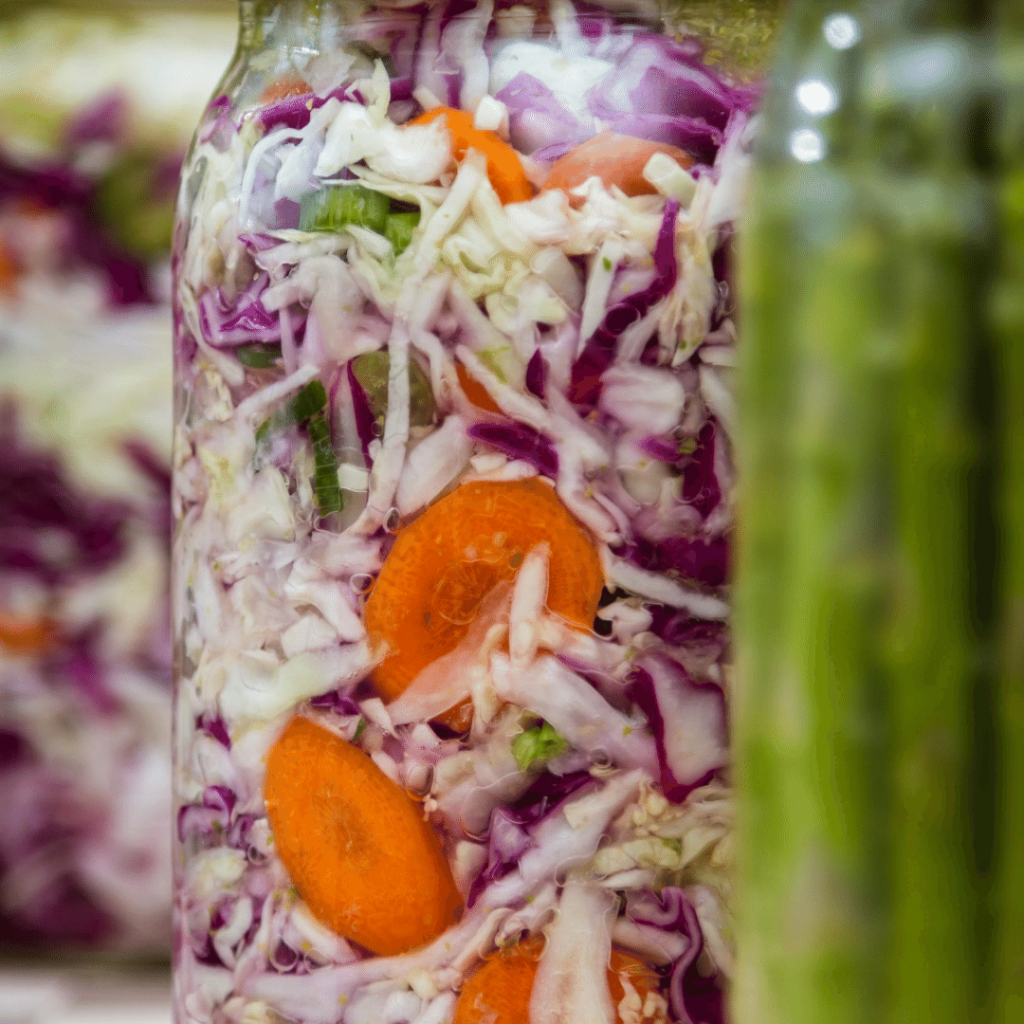
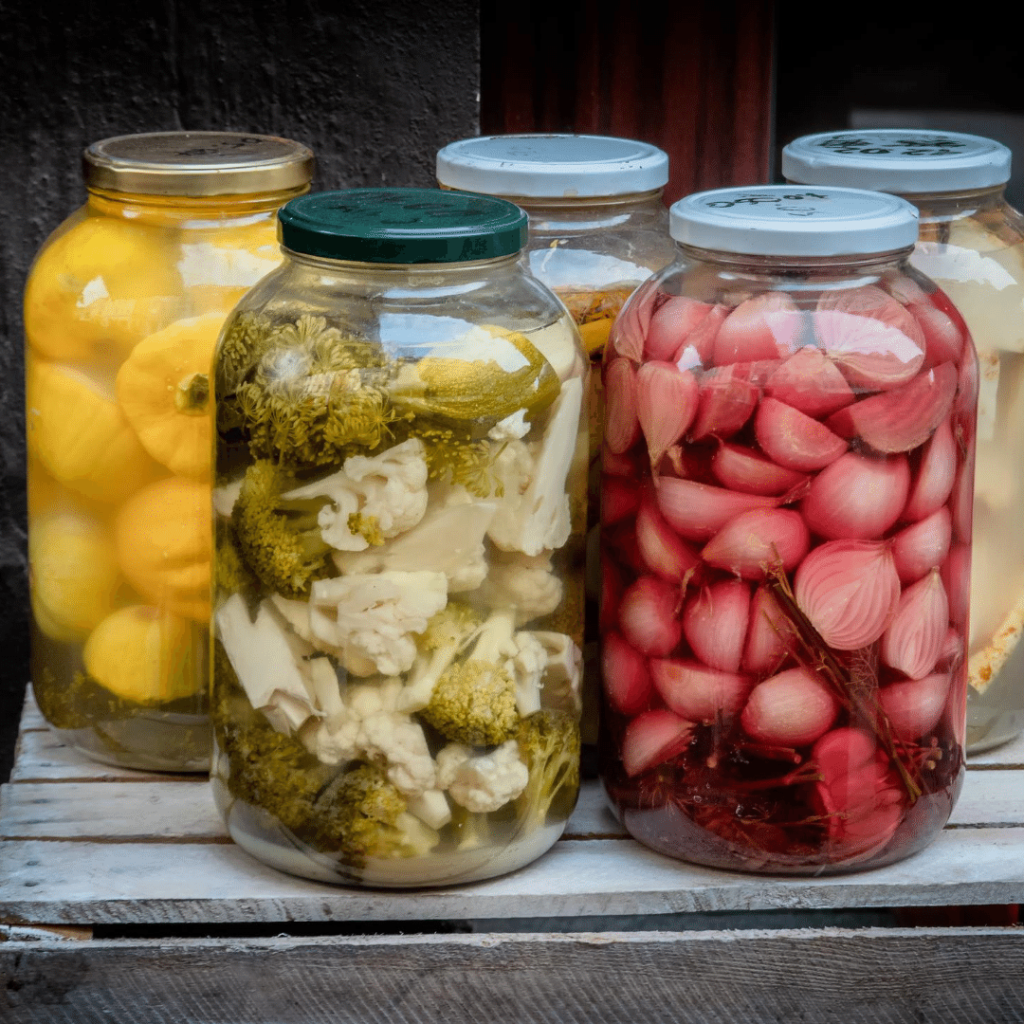
If you’re not sure what kind of veggies to start with, some of my favorites veggies for fermenting are beets, radishes, carrots, cauliflower, and cabbage… but you really can ferment just about any vegetable, or even a mix of your favorites.
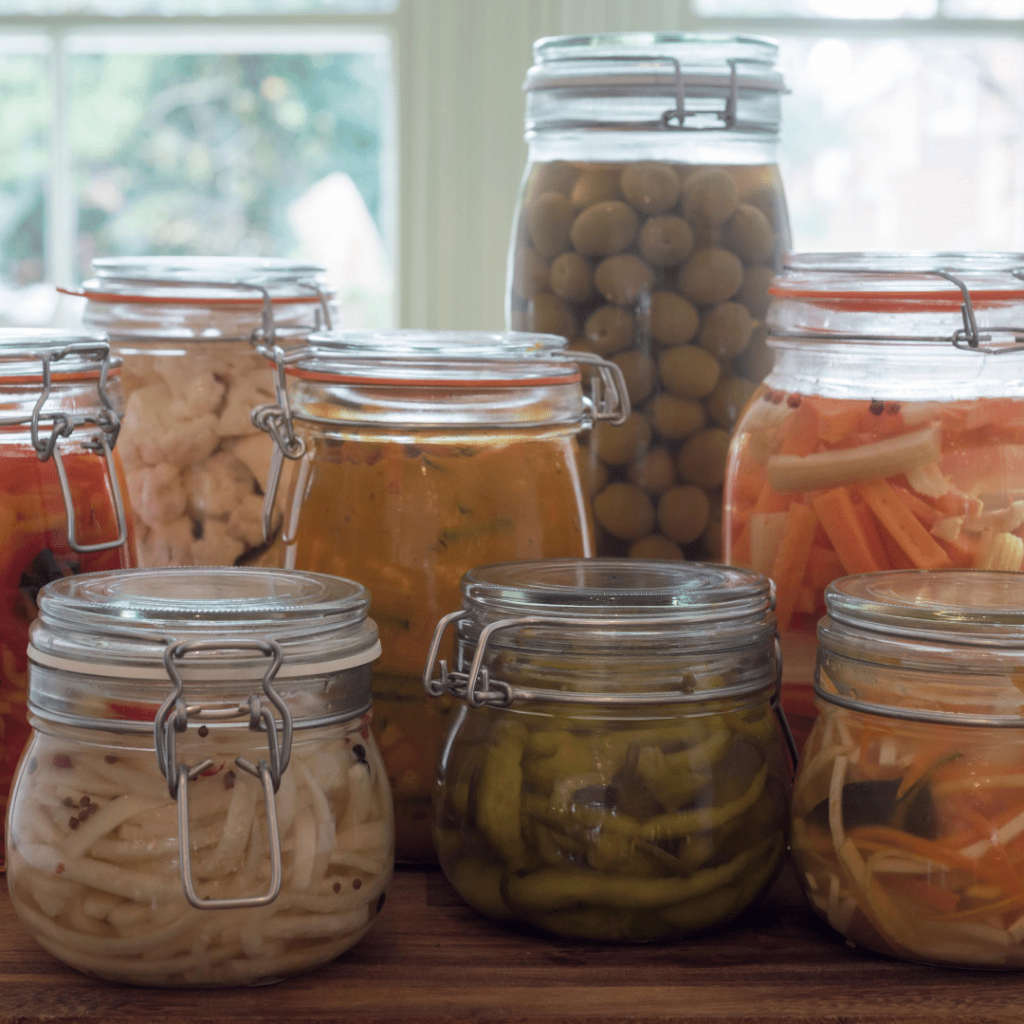
2. Next, you’ll need a vessel for your fermented veggies.
Canning jars make the perfect vessel for fermenting veggies, but you can also use a beautiful crock like this one, or a large ceramic or glass bowl covered with a plate.

You don’t have to sterilize your jars, you can simply wash them with hot, soapy water and let them air dry. If you want to be extra cautious, you can rinse them with a solution of water and vinegar.
3. Choose salt, whey, or a starter culture.
If you’re following a recipe, it will probably call for salt, whey and salt together, or a starter culture. I recommend experimenting with all three to see which one suits your taste with different veggies. I generally use either salt or a starter culture because they’re both readily available.
If you’re using a starter culture, add it according to the package directions or whatever recipe you are following. The starter I use can be purchased on Amazon, or you can check your local health food store.

If you’re using salt, be sure to choose a salt that’s appropriate for fermenting (I use this Kosher sea salt). For fermenting, you’ll need to add one to three tablespoons of salt per quart of water when making your brine.

4. Fill your jars with veggies.
To prepare your veggies for fermenting, you can slice, chop, shred, grate, or leave them whole. It’s really up to your preference and of course the type of vegetable you’re fermenting.
Now, stuff your veggies in the jars and add some seasonings if desired. Some of my favorite seasonings for fermented vegetables are dill, basil, bay leaves, onions, whole garlic cloves, and whole peppercorns. Leave about an inch of headspace at the top of the jar.
5. Add the brine and weigh your vegetables down.
Now, you need to cover your veggies with brine. To make the brine, simply stir the salt and water together until the salt is completely dissolved.
It’s crucial that the vegetables stay submerged while fermenting, so you’ll need to weigh them down with something. I use these fermentation weights (called Pickle Pebbles) because they’re the perfect size for my canning jars and they’re just super easy to clean, store, and use.

I’ve also used cabbage leaves, grape leaves, a small plate with a weight on top, or even just a plate over a large glass or ceramic bowl. It really just depends on what you have on hand and what type of vessel you’re using.
Once your jars are filled, cover the jars and place them in a cool, dark place. I like to use plastic lids for fermenting because the metal lids will rust over time, but if all you have are metal ones, they’ll work just fine.
6. The fermenting process and “burping” your jars.
Now, you’re simply going to put the veggies aside and let those good bacteria do their work. After a couple of days, you’ll begin to see bubbling in your jars, which means the bacteria are doing their job. I like to do my fermenting in a cool, dark place so the bacteria don’t work too fast, which could lead to a bubbly explosion.
Starting on day two, open the jars every day, morning and night, to “burp” them and let some of the gas escape. When you open the jars, hold them over the sink just in case they bubble up. If you forget to do this, your jars may explode, leading to a huge mess in your kitchen.
If you’re anything like me, you’ll probably forget to open a lid at some point. There’s nothing worse than hearing an explosion come from your kitchen in the middle of the night… and then having to clean up glass and partially fermented vegetables from floor to ceiling.
For this reason, I did invest in airlock lids for my fermenting jars. They take care of the “burping” process for you, so you never have to worry about a jar exploding. If you’re going to do a lot of fermenting, I highly, recommend getting some. You can absolutely ferment without them, but they’re really nice to have.

7. Move your fermented vegetables to cold storage.
After your vegetables are done culturing, they should be moved to cold storage, such as your refrigerator or a root cellar. This slows down the fermentation process and allows you to enjoy your fermented goodies for several months.
Fermentation can take anywhere from four days to two weeks, depending on the vegetable and your individual taste. Give them a taste test each day after the fourth day, so you know when they’re just right.
Once they’ve reached their ideal “puckeriness” for your taste, move them to the fridge or another cold dark place to slow down the fermentation process. They should last for several months.
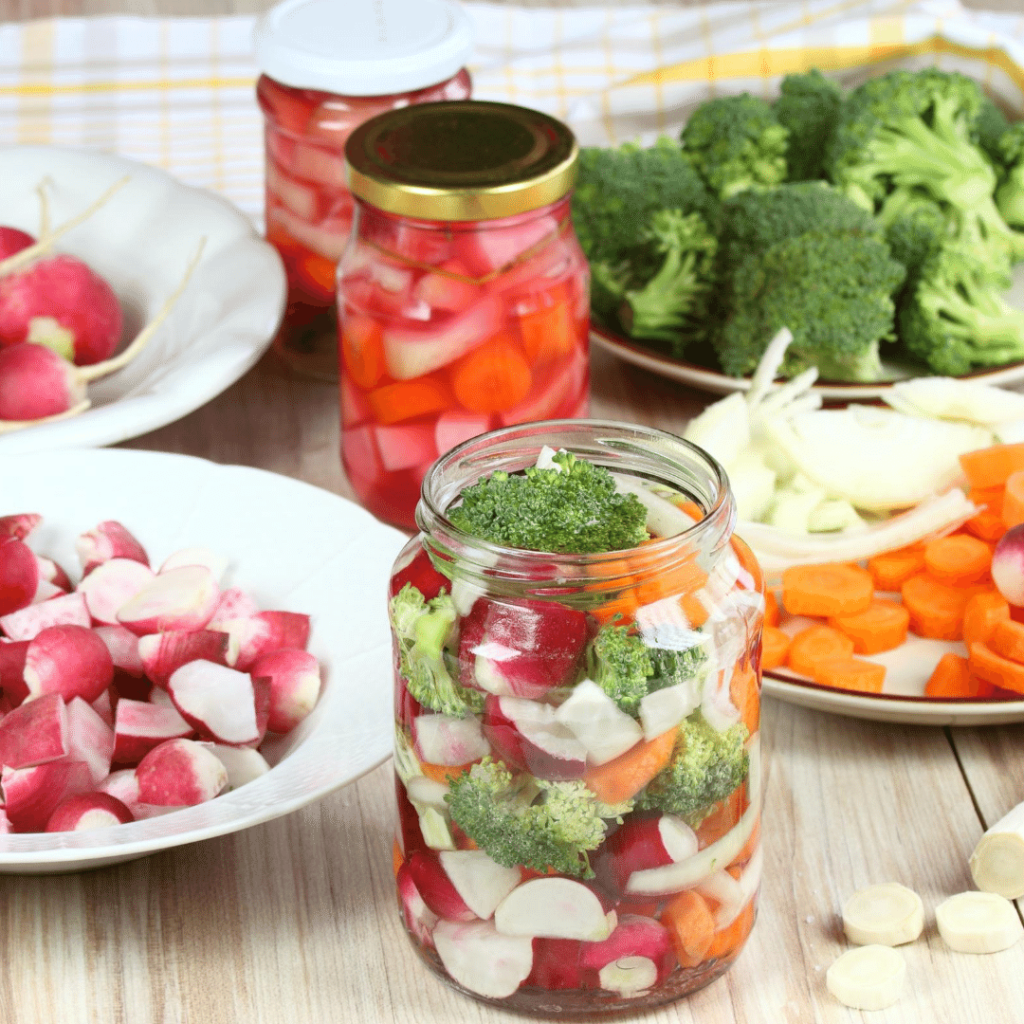
An Easy Recipe for Beginners: Lacto Fermented Radishes
Now that we’ve covered the entire process of Lacto-fermenting veggies, I want to walk you through the fermenting process step by step with an easy recipe for beginners. I love fermented radishes, and they couldn’t be easier to make. They’re delicious on salads or for snacking.
Here’s what you need to make Lacto Fermented Radishes:
- 4 cups of water
- 2 to 3 tablespoons of sea salt
- Enough radishes to fill a quart jar
- Seasonings, such as dill, garlic, and/or mustard seed
How to make Lacto Fermented Radishes:
- Prepare your brine by dissolving the salt in the water.
- Wash your radishes and remove the ends. Cut them into quarters.
- Place your seasonings in the bottom of a quart-sized canning jar. Add the radishes and cover them with the brine, leaving an inch of headspace at the top of your jar.
- Weigh the radishes down so they stay submerged in the brine.
- Cover the jar with a tight-fitting lid or an airlock lid.
- Allow the radishes to culture in a cool, dark place until they’ve reached your desired flavor and texture. If you’re using a regular lid, don’t forget to open them twice a day.
- Store your Lacto Fermented Radishes in the fridge or some other cold, dark place.
Wrapping it Up
Fermenting is an easy way to preserve your home-grown veggies and get some incredible health benefits at the same time. Experiment with different vegetables and combinations to see which ones your family likes best.
You’ll probably be surprised at how good they taste, but be careful not to overdo it at first, or you could end up with a tummy ache. I recommend about one tablespoon a day to start with, adding more over time.
Fair warning… before you know it, you’ll be adding fermenting vegetables to everything!